
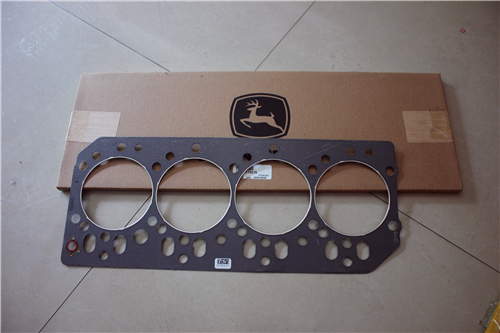
John Deere約翰迪爾強(qiáng)鹿柴油發(fā)動機(jī)氣缸蓋的拆解
詳細(xì)描述
John Deere約翰迪爾強(qiáng)鹿柴油發(fā)動機(jī)氣缸蓋的拆解
1. Drain engine oil and coolant.NOTE: On engines equipped with a low-profileturbocharger, remove turbocharger beforeattaching engine to repair stand.
2. Remove air inlet elbow. (See REMOVE AND INSTALLAIR INTAKE PIPE in Group 080.)NOTE: Turbocharger may be removed from engine whileassembled to exhaust manifold, if desired.
3. On turbocharged engines, disconnect turbocharger oilinlet and oil drain lines (A) at turbocharger (B).Remove turbocharger and exhaust elbow (shownremoved). (See REMOVE TURBOCHARGER in Group080.)
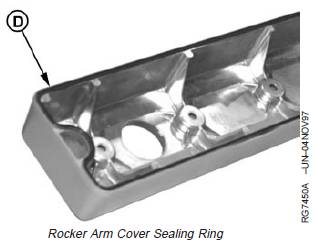
IMPORTANT: Replace rocker arm cover sealing ring(D) every time the rocker arm cover isremoved during engine or cylinder headoverhaul.
4. Remove hex nuts and O-rings from rocker arm cover(C).Lift off cover. Save O-rings for reassembly or replaceas necessary.
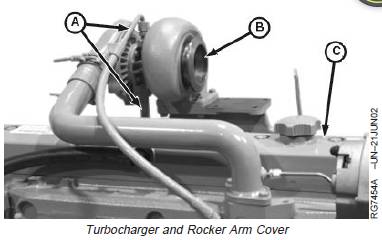
A—Turbocharger Oil Inlet and Oil Drain Lines
B—Turbocharger
C—Rocker Arm Cover
D—Rocker Arm Cover Sealing Ring
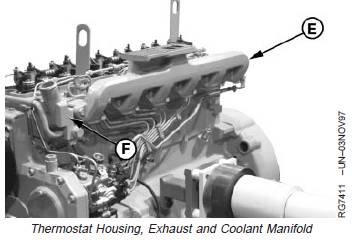
5. Using guide studs, remove exhaust manifold (E).NOTE: On some engines, the thermostat housing/coolantmanifold (F) is part of the cylinder head.
6. Remove thermostat housing/coolant manifold (F).
E—Exhaust Manifold
F—Thermostat Housing/Coolant Manifold
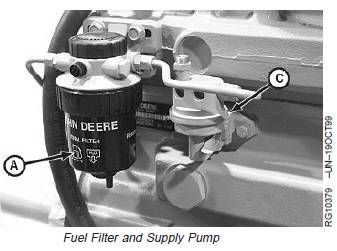
NOTE: Position of fuel filters (A) and (B) and supplypump (C) vary by engine and injection pumpapplications. See Section 02, Group 090 ofCTM207—Mechanical Fuel Systems, CTM170—Level 4 Electronic Fuel Systems with Bosch VP44Pump, CTM331—Level 12 Electronic FuelSystems with Stanadyne DE10 Pump, orCTM284—Level 1 Electronic Fuel Systems withDelphi/Lucas DP201 Pump for procedures toremove filter(s) and/or supply pump as required.
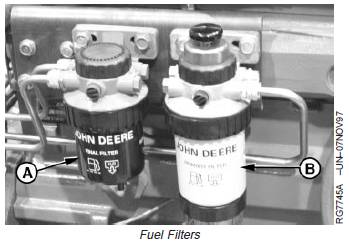
7. Disconnect fuel lines and remove fuel filter(s) (A) and(B) and mounting brackets as required.
8. Remove fuel supply pump (C), if equipped. Inspectface of pump lever for wear. If worn flat or concave,replace supply pump.
9. Remove alternator, if desired. (See REMOVE ANDINSTALL ALTERNATOR in Group 100.)
A—Final Fuel Filter
B—Primary Fuel Filter/Water Separator
C—Fuel Supply Pump
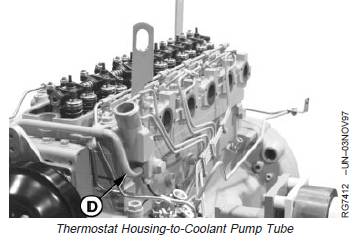
10. Remove thermostat housing-to-coolant pump tube(D).
D—Thermostat Housing-to-Coolant Pump Tube
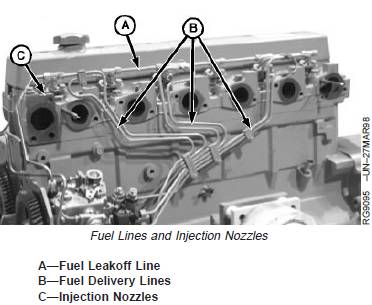
11. Remove fuel leakoff line (A) and fuel delivery lines (B)as an assembly. Remove fuel injection nozzles (C).See appropriate procedure:
· REMOVE FUEL INJECTION NOZZLES in Section02, Group 090 of CTM207—Mechanical FuelSystems.
· REMOVE FUEL INJECTION NOZZLES in Section02, Group 090 of CTM170—Level 4 Electronic FuelSystems with Bosch VP44 Pump.
· REMOVE FUEL INJECTION NOZZLES in Section02, Group 090 of CTM331—Level 12 ElectronicFuel Systems with Stanadyne DE10 Pump.
· REMOVE FUEL INJECTION NOZZLES in Section02, Group 090 of CTM284—Level 1 Electronic FuelSystems with Delphi/Lucas DP201 Pump.
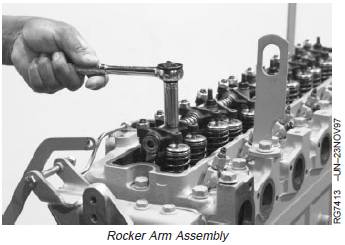
NOTE: Loosen all rocker arm adjusting screws prior toremoving assembly.
12. Remove rocker arm assembly.
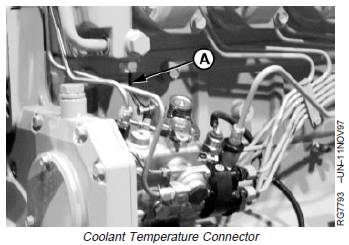
13. Disconnect coolant temperature connector (A) frominjection pump wiring harness.
A—Coolant Temperature Connector
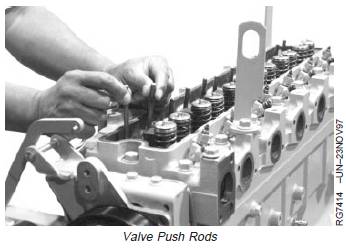
14. Remove all push rods and identify for reassembly inthe same location. Clean and inspect push rods.
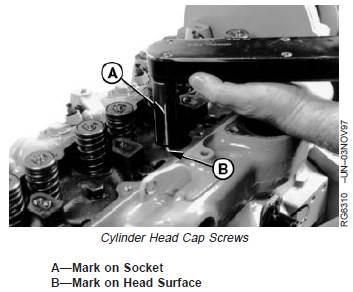
15. If a cylinder head gasket failure has occurred, checkand record torque on each cylinder head cap screwbefore removing.To check cylinder head cap screw torque:
a. Make a reference mark (in-line) on socket (A) andcylinder head surface (B).
b. Loosen cap screw at least 1/2 turn.
c. Retighten cap screw (using a torque wrench) untilreference marks align and record torque.
16. Remove all cylinder head cap screws.
IMPORTANT: DO NOT use screwdrivers or pry barsbetween cylinder block and head toloosen head gasket seal. Screwdriversor pry bars can damage cylinder headand block gasket surfaces.
17. Lift cylinder head (A) from block. If cylinder headsticks, use a soft hammer to tap cylinder head.
A—Cylinder Head
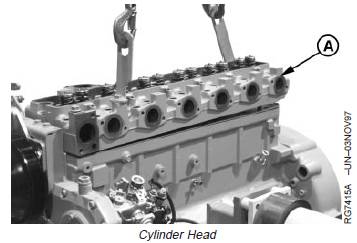
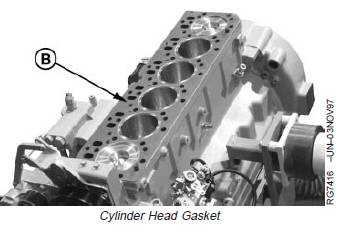
18. Remove cylinder head gasket (B). Inspect for possibleoil, coolant, or combustion chamber leaks. Also,check for evidence of incorrect head gasket beingused.
NOTE: Do not rotate crankshaft with cylinder headremoved unless cylinder liners are secured withcap screws and large flat washers. (SeeMEASURE CYLINDER LINER STANDOUT[HEIGHT ABOVE BLOCK], later in this group.)
B—Head Gasket
400-100-8969???15088860848
0574-26871589? 15267810868
0574-26886646? 15706865167
0574-26871569 18658287286


 Deutsch
 Espaol
 Franais
 Italiano
 Português
 日本
日本 韓國
韓國 阿拉伯
阿拉伯 български
 hrvatski
 esky
esky Dansk
Dansk Nederlands
 suomi
suomi Ελληνικ
 印度
印度 norsk
norsk Polski
 Roman
Roman русский
 Svenska
 中文(簡)
中文(簡)